
Online Platform With Special Offers for Traders From India

Register a free account ⚡️

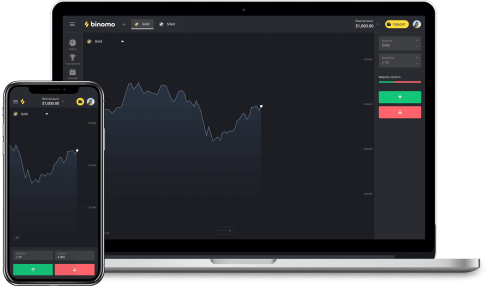
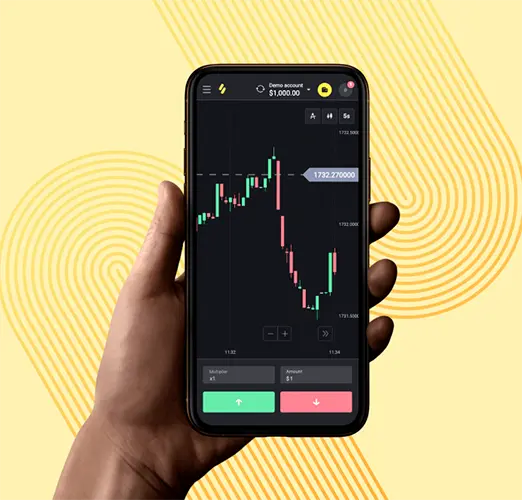
Practice with a demo account

Deposit money and trade

What is Binomo
At its core, it offers a diverse array of trading instruments, encompassing currencies, cryptocurrencies, stocks, commodities, indices. This extensive range caters to the diverse preferences and strategies of traders worldwide.
The brand and all rights to the platform are owned by Dolphin Corp LLC.
Reliability and Regulation

The IFC also has a compensation fund for all its members, including Binomo, and it implies that your trades are protected.
Binomo has also been the recipient of several prestigious awards, including the “Most Trusted Platform Global” by International Business Magazine in 2023 and the “Most Secure Trading Platform Global” by World Business Outlook in the same year.
Comprehensive Trading Conditions
One of its new features is the non-stop trading mode, which allows traders to open multiple positions simultaneously without waiting for previous trades to close.
To facilitate informed decision-making, Binomo provides access to comprehensive market analysis and forecasts for various trading instruments.
In addition, the user gets a developed bonus system, tournaments among traders, a convenient web terminal and mobile apps with the necessary indicators, as well as guaranteed triggering of trade orders.
To summarize, Binomo provides a reliable and profitable environment for binary options trading.
Types of Accounts
Binomo offers 5 distinct account types to accommodate traders at different levels of experience and investment capacity:

- Demo Account: This risk-free account allows traders to familiarize themselves with the platform, practice trading strategies, and gain hands-on experience without risking real capital.
- Standard Account: With a minimum deposit of $10, the Standard Account provides access to 48 trading assets and offers a maximum profit margin of 84% and a maximum bonus of 100%.
- Gold Account: Designed for more experienced traders, the Gold Account requires a minimum deposit of $15,000 and provides access to 61 trading assets. It offers a maximum profit margin of 86%, a maximum bonus of 150%, and additional benefits like investment insurance and a personal manager.
- VIP Account: The VIP Account caters to high-net-worth traders and requires a minimum deposit of $30,000. It provides access to 75 trading assets, a maximum profit margin of 90%, a maximum bonus of 200%, and exclusive privileges such as investment insurance, a personal manager, and faster withdrawal processing times.
- Prestige Account: The Prestige Account, the newest addition to our lineup, offers monthly access to maximum trading opportunities. It encompasses all the benefits of the VIP Account with additional perks: deposit bonuses up to 300%, special Prestige tournaments, personal manager and maximum priority in support, In addition to the weekly 10% cashback, an extra 5% cashback will be added.

Low minimum deposits
Starting at $10, Binomo minimum deposit creates a trading opportunity for people of all income levels. The cost per trade is flexible too. You could begin trading at $1 to minimize risks especially when learning.

A wide variety of investment instruments
The platform has over 70 assets from different categories such as currencies, crypto, stocks, commodity, indices, and classic or minute contracts. Besides, users can participate in tournaments, affiliate marketing, and bonus programs to earn extra money and other prizes.

Trade on the go
With increasing demand, Binomo created Android and iOS apps to make their service accessible on smartphones. It’s now convenient to trade and earn money from home, when traveling, or in your office.
Deposits and withdrawals
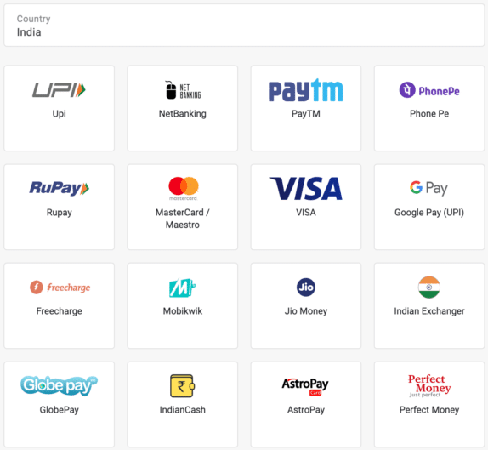
Traders can deposit funds using popular options such as Bank transfer in India (IMPS), VISA, MasterCard, Advcash, Skrill, Perfect Money, and various cryptocurrency wallets like Bitcoin and Litecoin.
The broker does not charge any withdrawal fees, which further enhances the overall trading experience for clients.
Withdrawal time depends on the level of the account and the selected payment system. It ranges from 4 hours to 3 days.
Binomo trading Support
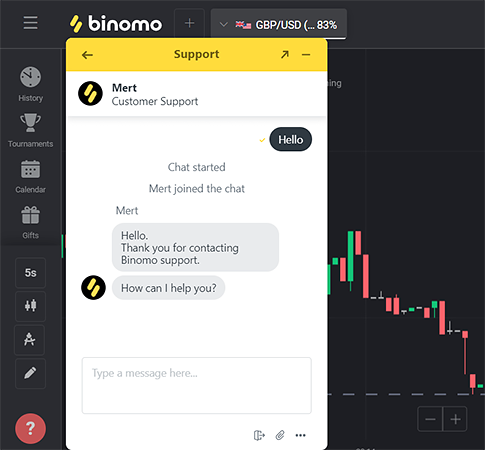
The platform offers a comprehensive Help Center, akin to a trader’s encyclopedia, where users can find answers to frequently asked questions, trading strategies, and valuable insights.
For personalized support, traders can reach out to dedicated support team via email [email protected] or through the platform’s integrated chat.
The support team is available 24/7, ensuring that traders receive timely assistance regardless of their location or time zone.
Frequently asked questions about Binomo login
Is Binomo safe?
Binomo employs a range of security features to safeguard accounts and funds effectively. Identity and payment method verification are swiftly conducted through AI technology, typically taking less than 2 minutes on average. Access to accounts is further secured with 2-factor authentication. Compliance with the PCI international standard ensures the protection of payment card data.
With a track record since 2014, Binomo has earned numerous accolades. Additionally, each account benefits from user fund insurance up to €20,000.
Is Binomo legal in India?
Yes, it is a legitimate and regulated trading platform. It is a category “A” member of the International Financial Commission (IFC) and has been audited by Verify My Trade (VMT), ensuring the quality of trade execution and adherence to industry standards.
How to use Binomo?
First, log in to a live account to start trading with Binomo. Specify a trading asset, set the value you intend to trade, and for how long. Use the green and red buttons to predict the trading direction. After the set time, if the chart matches your prediction, the system pays the earnings to your account.
What is the minimum deposit?
Binomo accepts an initial deposit of $10 and users can trade at $1. The base currencies applicable on this platform include EUR, USD.
Is it guaranteed that I will make a profit?
The platform does not guarantee a consistent income due to the nature of the financial market. Furthermore, statistics indicate that many traders experience losses. It is advisable to approach fund investment with caution and adhere to one’s trading strategy.